
Views: 0 Author: Site Editor Publish Time: 2025-09-03 Origin: Site


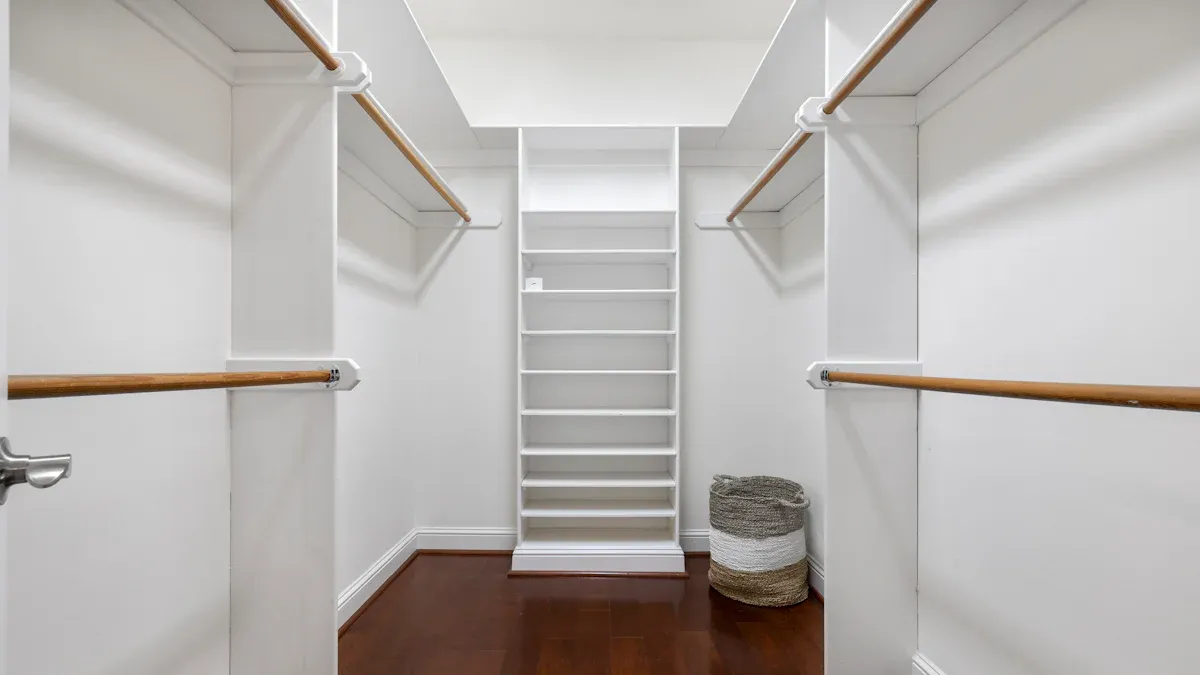
You open your closet and notice the wardrobe rod sagging or the brackets don’t match your style. Sound familiar? Choosing the right wardrobe bracket can make a huge difference in both function and organization. Start by measuring your closet and thinking about your wardrobe needs. With a few simple tips, you can boost closet organization, improve wardrobe support, and enjoy a neater space every day.
Measure your closet’s width, depth, and height carefully before choosing wardrobe brackets and rods to ensure a perfect fit.
Match your closet rods’ diameter exactly with the wardrobe brackets to avoid wobbling or falling rods.
Use strong materials like steel or stainless steel brackets for heavy clothes and add center support brackets for rods longer than 4 feet to prevent sagging.
Always mount wardrobe brackets into wall studs or a solid wooden board for secure support; drywall alone cannot hold heavy loads.
Plan rod placement and storage based on your needs, using double-rod systems or adjustable brackets to maximize space and keep your closet organized.
Before you pick out any wardrobe bracket, you need to get the right measurements for your closet. This step helps you avoid surprises and makes sure your rods fit perfectly.
Start by measuring the width, depth, and height of your closet. These numbers help you choose the right wardrobe bracket and rods for your space. Here’s a quick guide to standard closet sizes:
Closet Type | Width Range | Depth (Standard) | Height (Standard) |
|---|---|---|---|
Reach-In Closet | 3 to 6 feet | 24 inches | About 8 feet |
Walk-In Closet Type | Width (ft) | Depth (ft) | Height (ft) |
|---|---|---|---|
Minimum Walk-In Closet | 5 | 5 | N/A |
Small Walk-In Closet | 4 | 8 | 4 |
Medium Walk-In Closet | 7 | 9 | 6 |
Large Walk-In Closet | 12 | 14 | 7 |
Dressing Room-Style Closet | >12 | >14 | 7 |
Take your own measurements and compare them to these standards. This helps you spot any unusual closet shapes or sizes before you shop for rods or wardrobe brackets.
Getting the right spot for your rods makes a big difference. Most pros suggest placing the top rod no higher than 84 inches. This keeps your clothes within reach. For long items like dresses or coats, set the rod between 66 and 84 inches. If you want double rods, put the bottom rod between 36 and 42 inches and the top rod between 78 and 84 inches. Adjust these heights based on your own reach and the length of your clothes. This way, you use every inch of your closet and keep your rods easy to access.
Tip: Adjustable shelving lets you change rod height as your storage needs change.
The type of wall in your closet affects how you install wardrobe brackets and rods. Check out this table for the best methods:
Wall Type | Installation Method & Bracket Choice | Key Considerations |
|---|---|---|
Drywall + Wood Studs | Attach a wooden board (e.g., 1x6) screwed directly into studs; mount wardrobe brackets on this board. | Drywall alone cannot support heavy loads; studs provide structural support; board spreads load evenly. |
Plaster Walls | Different approach needed; drywall anchors are not suitable. | Plaster is stronger than drywall but still requires anchoring to structural elements behind the wall. |
Brick/Concrete or Metal Studs | Use specialized anchors and installation methods suitable for masonry or metal framing. | Drywall or plaster itself does not support load; must rely on masonry or metal stud anchors. |
Hollow Drywall | Hollow-wall anchors are not recommended for heavy or dynamic loads like wardrobe rods. | Drywall cannot reliably hold weight or movement; use boards attached to studs instead. |
Drywall alone struggles to hold the weight of rods and clothes.
Always mount wardrobe brackets into studs or use a wooden board for extra support.
Avoid hollow-wall anchors for rods. They can fail under heavy loads.
With the right closet measurements, smart rod placement, and a solid understanding of your wall type, you set yourself up for a sturdy, organized closet that keeps your rods and wardrobe brackets secure.
When you plan your closet, you want to make sure every inch works for you. Thinking about storage needs helps you get the most out of your closet rods, wardrobe brackets, and shelves. Let’s break down what matters most.
You don’t want your rods to sag or your wardrobe brackets to fail. Start by checking the weight capacity of your closet rods and brackets. Standard wooden rods usually support between 80 to 100 pounds, but some hardwood rods can handle up to 500 pounds if you pair them with strong wardrobe brackets and proper installation. The strength of your brackets and how you mount them makes a big difference. If you use a pull-down closet rod system, expect a load capacity of about 33 pounds per bracket. Always match the weight capacity of your rods and wardrobe brackets to the amount of clothing you plan to hang. If you have heavy coats or lots of clothes, choose wardrobe centre brackets for extra support in the middle. This keeps your closet safe and sturdy.
Tip: Spread out your clothes evenly across rods to avoid putting too much weight on one spot.
Want more hanging space? Double-rod systems double your closet’s capacity for shorter garments like shirts and pants. You install two rods, one above the other, using wardrobe end brackets and wardrobe sockets for secure support. This setup boosts storage efficiency and organization, letting you group similar items together. Double-rod systems work great for maximizing vertical space, but they can make it harder to reach shoes or folded clothes below. If you want more flexibility, look for adjustable rods and brackets. Custom closet systems that combine rods, shelves, and wardrobe brackets offer better functionality and organization than basic rod-only setups.
Double-rod systems increase hanging capacity.
Single-rod systems often waste space above shorter clothes.
Custom setups with adjustable rods and shelves improve organization and support.
A closet should fit your lifestyle. Accessibility matters for everyone, especially kids or people with mobility challenges. Place rods and wardrobe brackets at heights you can reach easily. Adjustable shelving lets you change the layout as your needs change. If you want to store tall boots or folded items, use adjustable rods and wardrobe centre brackets to create more space. Securely mount wardrobe brackets to wall studs for safety and stability. Custom closet designs let you tailor rod placement and bracket types to your height and habits, making your closet more functional and user-friendly.
Note: Group frequently used items near the front of your closet for easy access and better organization.
Choosing the right wardrobe bracket can make your closet stronger and more stylish. You have several types to consider, and each one works best in different situations. The material you pick for your brackets also affects how much weight your closet can handle and how long your setup will last.
Side-mount wardrobe brackets attach directly to the side walls of your closet. You usually see these in reach-in closets or anywhere you have sturdy side panels. This type of bracket gives strong support for your wardrobe rods and works well for most standard closets. If you want to hang heavy coats or lots of clothes, look for steel or stainless steel brackets. These materials offer the best strength and durability. Aluminum brackets are lighter and easy to install, but they work best for lighter loads. Wood brackets look great and add a natural touch, but they suit decorative or light-duty use only.
Ceiling-mount wardrobe brackets come in handy when you have limited space above your closet doors or when crown molding gets in the way. You might also use these brackets if your closet goes all the way up to the ceiling or if you want to avoid drilling into the cabinet. Ceiling-mount brackets let you hang rods where wall mounting is not possible. Stainless steel is a smart choice for ceiling-mount brackets because it resists rust and supports heavy loads. Aluminum works for lighter wardrobes and is easy to handle during installation.
Tip: Use ceiling-mount brackets in closets with low ceilings, pitched roofs, or when you want a modern, floating look.
Long closet rods need extra help in the middle. Center support brackets prevent sagging and keep your wardrobe rods steady. If your closet rod is longer than 4 feet, you should add a center support bracket. Steel and stainless steel materials give the best support for heavy wardrobes. Aluminum center supports are fine for lighter loads. Always match the bracket material and type to your closet’s structure and the weight you plan to hang.
Here’s a quick guide to bracket materials:
Material | Strength & Durability | Corrosion Resistance & Suitability | Typical Use Cases & Notes |
|---|---|---|---|
Steel | Strong and durable; needs coating to prevent rust | Moderate; coat for rust prevention | Heavy loads; indoor use |
Stainless Steel | Very strong; excellent for heavy-duty use | Excellent; best for damp or harsh environments | Long-term, heavy-duty, or outdoor closets |
Aluminum | Lightweight; less strong | Good; resists corrosion, especially if anodized | Light to medium loads; easy installation |
Wood | Less durable; can warp or stain | Poor; not for damp areas | Decorative or light-duty closets |
Always choose wardrobe brackets and support brackets that match your closet’s needs and your style. The right material and type keep your wardrobe organized and safe.
Making sure your closet rods fit perfectly with your brackets is the secret to a sturdy, organized closet. If you’ve ever struggled with sagging rods or wobbly supports, you know how important it is to get this step right. Let’s break down what you need to check for a secure and long-lasting setup.
You want your closet rods to fit snugly into the wardrobe bracket. If the rod is too small, it can wobble or even fall out. If it’s too big, it won’t fit at all. Most closet rods come in standard diameters, and wardrobe brackets are designed to match these sizes. Here’s a quick guide to help you pick the right rods and brackets:
Closet Rod Diameter | Bracket Inner Diameter | Notes |
|---|---|---|
1/2" | Matches 1/2" rod | Standard fit |
5/8" | Matches 5/8" rod | Standard fit |
3/4" | Matches 3/4" rod | Standard fit |
1" | Matches 1" rod | Standard fit |
1-1/4" | Matches 1-1/4" rod | Secure fit, popular choice |
1-3/8" | Matches 1-3/8" rod | Standard fit |
1-1/2" | Matches 1-1/2" rod | Standard fit |
2" | Matches 2" rod | Standard fit |
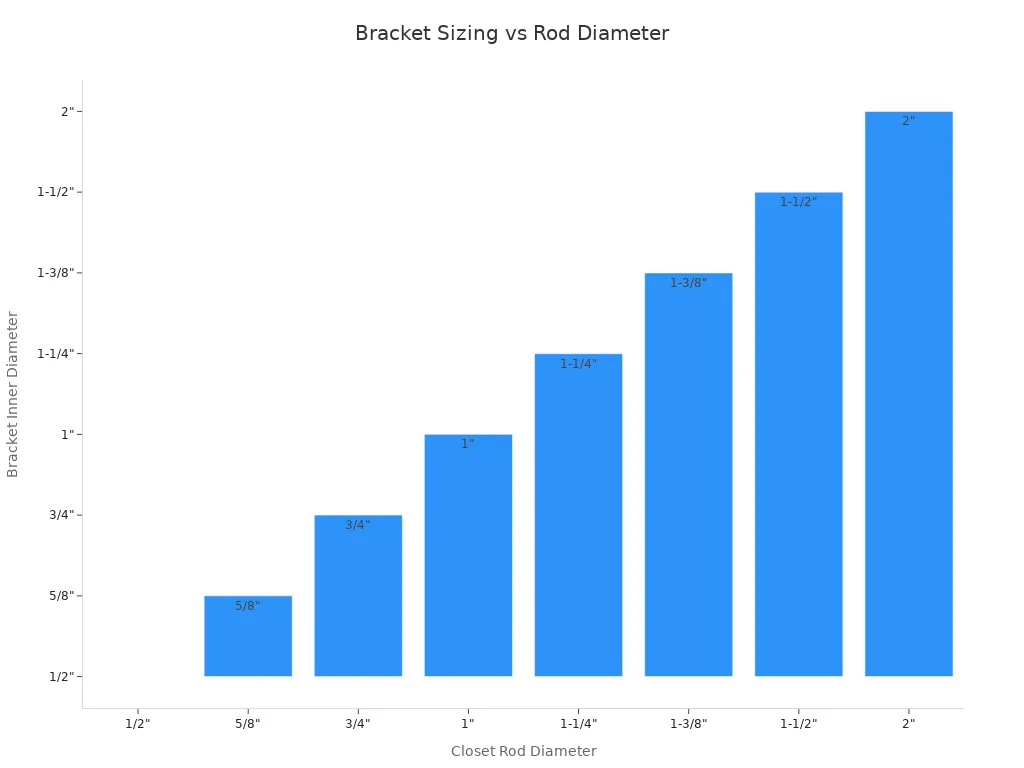
When you shop for closet rods, always check the diameter. Match it exactly to the wardrobe bracket’s inner diameter. Some brackets include a set screw or a rear pin with ridges. These features lock the rod in place, so it won’t spin or slide out. If you want extra security, look for brackets with these options.
Tip: If you use adjustable rods, make sure both ends fit tightly in the wardrobe end bracket or wardrobe socket. A loose fit can cause the rod to shift or fall.
Getting the right size bracket is just as important as picking the right rods. If you mismatch the sizes, your closet rods won’t sit securely, and you risk damaging your closet walls or your clothes. Here’s what you need to know:
Always choose wardrobe brackets that match the diameter of your closet rods. For example, a 1-1/4" rod needs a 1-1/4" bracket.
Some wardrobe brackets come with set screws. These let you tighten the rod in place, which is great for adjustable closet rods or heavy loads.
Satin brass end brackets often have rear pins with tapered ridges. These create a snug fit and keep the rod from slipping out.
If you use adjustable rods, double-check that the bracket can handle the full range of the rod’s diameter.
Note: If you’re installing adjustable closet rods, test the fit before final installation. You want a bracket that holds the rod firmly but still lets you adjust the length as needed.
Even if you pick the right rods and brackets, you still need to support them properly. Long closet rods can sag in the middle, especially if you hang heavy clothes. Here’s how you can keep your closet sturdy:
Add Center Supports: If your closet rods are longer than 4 feet, install a wardrobe centre bracket at the midpoint. This stops sagging and keeps everything level.
Reinforce Metal Rods: Slide a wooden dowel inside hollow metal rods. This trick adds strength and prevents bending.
Use Metal Sleeves: For wooden rods, metal sleeves fit over the rod and secure with screws. This boosts durability.
Space Support Brackets: Place support brackets every 3 feet along the rod. This spreads out the weight and keeps the rod from bowing.
Install Cleats: Attach a 1x4 board (cleat) to the wall, fastened into studs. Mount your wardrobe brackets on this board. Cleats spread the load and give your closet rods a solid base.
Try Angle Brackets: Angle brackets add extra support, especially for heavy-duty closets or when you can’t find a stud.
Double Rod Systems: If you want more hanging space, install a second rod below the first. Use sturdy wardrobe end brackets and wardrobe sockets for both rods.
Distribute Weight: Hang heavier items near the supports. Don’t cluster all your coats in one spot.
Check and Maintain: Regularly check your rods and brackets for wear. Tighten screws and adjust as needed.
Cleats and angle brackets help your closet rods handle more weight. They also prevent the rods from pulling out of the wall.
Always mount wardrobe brackets into studs or a solid cleat. Drywall alone can’t hold the weight of loaded closet rods.
Pro Tip: For adjustable closet rods, use wardrobe centre brackets that allow for easy length changes. This way, you can adapt your closet as your storage needs grow.
You also want to follow industry standards for rod placement. For a single-rod closet, mount the rod 66 inches above the floor. This height gives you plenty of space for long garments. For double-rod systems, place the top rod at about 82 inches and the lower rod at 40 inches. In kids’ closets, set the lower rod at 30 inches. Always keep your closet rods at least 12 inches from the back wall. This prevents clothes from bunching up and keeps them wrinkle-free. Leave at least 2 inches between the rod and any shelf above, so hangers move easily.
Remember: The right rods, matched with the right wardrobe bracket and support system, make your closet last longer and work better for you.
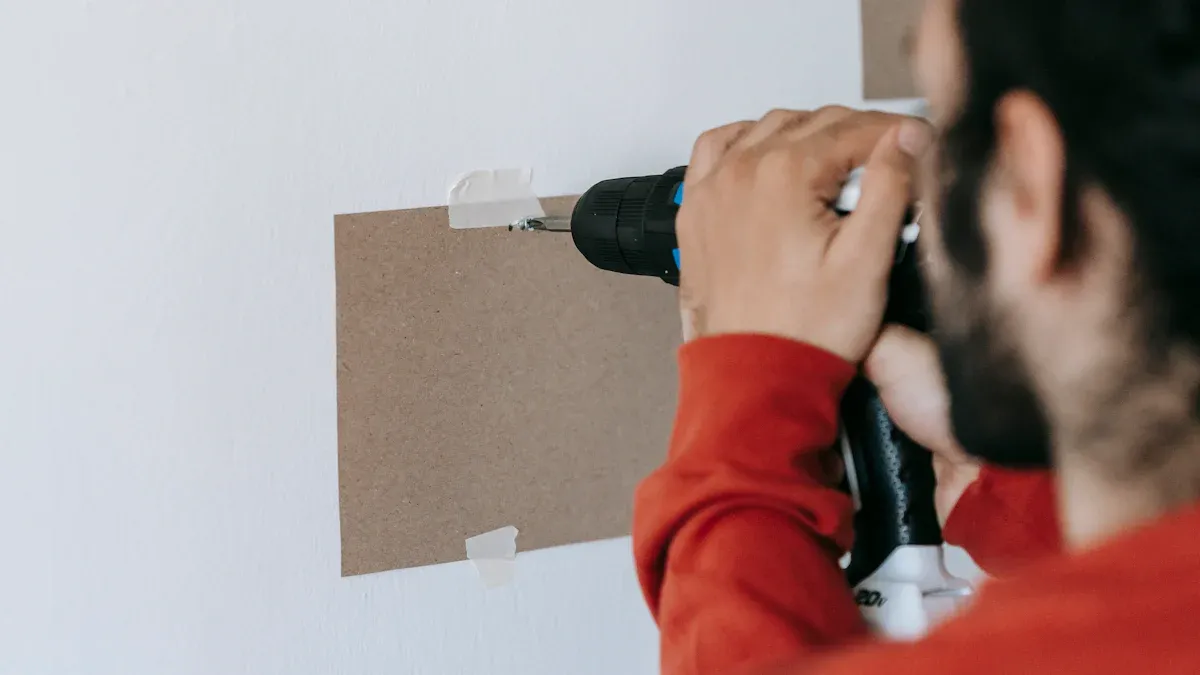
Getting your closet set up with sturdy wardrobe brackets makes a big difference in how well your rods hold up. You want to make sure your installation goes smoothly and keeps everything secure for years. Let’s walk through the process step by step.
Before you start, gather the right tools. Having everything ready makes installation faster and helps you avoid mistakes. Here’s a list of what you’ll need:
Power drill and drill bits
Stud finder
Measuring tape
Level
Pencil
Screwdriver
Saw (if you need to cut shelves or rods)
Safety glasses
Hammer or pliers (depending on your system)
Wall anchors (if required for your wall type)
You might also want a box cutter or knife for packaging and a magnetic stud finder for plaster walls. These tools help you measure, mark, and mount your wardrobe brackets and rods with confidence.
The way you mount wardrobe brackets depends on your closet’s wall type. For most closets, you should anchor brackets into wall studs. This gives your rods the strength to hold heavy clothes without sagging. Use wood screws at least 2 inches long for wooden studs. For metal studs, pick fine-thread drywall screws. Avoid drywall anchors for heavy loads—they can fail and cause your rods to fall.
Here’s a quick table with best practices:
Installation Aspect | Recommendation |
|---|---|
Anchor brackets into wall studs | Always recommended for load capacity |
Maximum spacing between wall brackets | 48 inches max |
Maximum overhang beyond end brackets | 24 inches max |
Customization | Follow ergonomic height and spacing guidelines |
If you have masonry walls, use a hammer drill with masonry bits and self-anchoring screws. For plaster, find studs with a magnetic stud finder and drill a pilot hole to confirm. Always follow manufacturer instructions for spacing and height. This keeps your closet rods and wardrobe brackets secure and easy to use.
You want your closet rods to stay straight and strong. Here are some tips to keep everything stable:
Use a level to make sure your rods and wardrobe brackets line up evenly.
Securely attach shelves to brackets with screws to prevent wobbling.
Test stability by adding clothes gradually. Watch for sagging or movement.
Distribute weight evenly across rods. Don’t hang all heavy items in one spot.
Check for loose screws or damage during regular closet maintenance.
Fill oversized anchor holes with wall repair compound before reinstalling.
Avoid over-tightening screws to prevent drywall damage.
Common mistakes include loose anchors, misaligned rods, and cracked drywall. You can avoid these by measuring carefully, using the right tools, and following these tips. If you use wardrobe end brackets, wardrobe centre brackets, or wardrobe sockets, make sure they fit your rods snugly and mount them into studs or solid boards.
A secure installation means your closet stays organized and your rods support your wardrobe for years.
You can create a custom closet that fits your needs by following a few simple steps. Measure your closet, think about your storage needs, pick the right wardrobe brackets, and make sure your rods and closet system work together. Before you buy or install anything, make a checklist to review your closet organization plan. Double-check your measurements for a sturdy, stylish closet. When you focus on customizability, space efficiency, and daily organization, you boost efficiency and enjoy a clutter-free wardrobe.
A well-designed custom closet offers:
Easy access to clothes and rods for better organization
Custom closet organization that adapts as your needs change
Long-lasting durability and improved efficiency
Stylish solutions for creating a contemporary closet
Enjoy the benefits of a tidy, flexible closet that makes every day easier!
Use a tape measure to check the width, depth, and height of your closet. Write down these numbers. This helps you pick wardrobe brackets that fit your closet and support your clothes.
If your closet rod is longer than 4 feet, you should add a center support bracket. This keeps the rod from sagging and helps your closet stay sturdy.
Yes, but always mount the brackets into wall studs. Drywall alone cannot hold the weight of your clothes. Use a stud finder to locate studs in your closet before drilling.
Side-mount wardrobe brackets work well in small closets. They attach to the side walls and save space. Choose strong materials if you hang heavy clothes in your closet.
Check your closet brackets and rods every few months. Look for loose screws or sagging rods. Tighten or replace parts as needed to keep your closet safe and organized.


