
Views: 0 Author: Site Editor Publish Time: 2025-12-11 Origin: Site


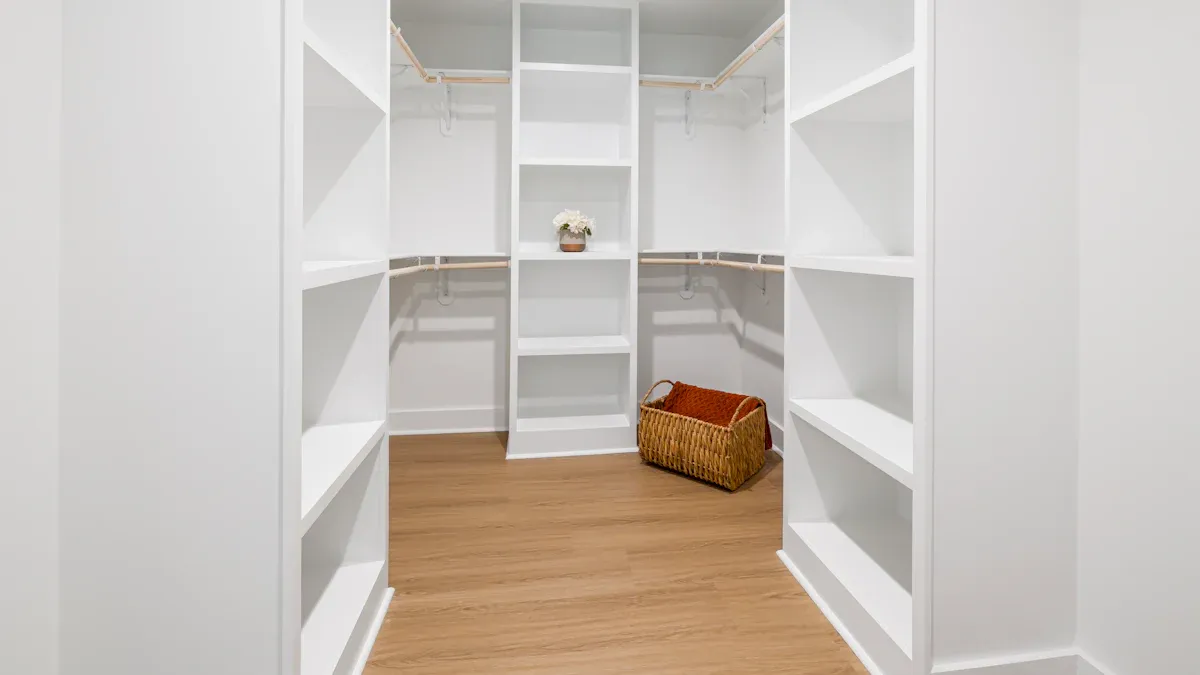
You can install wardrobe brackets in your closet with just a few basic tools and a little patience. Most beginners spend around six hours on a standard closet, so don't rush—steady progress pays off. You only need a few things to get started:
Tape measure
Level
Drill with drill bits (3mm for drywall pilot holes, 5mm for wood studs, cobalt/titanium bits for metal studs)
Stud finder
Pencil
Screws (2.5-inch wood screws for studs, 3-inch toggle bolts for drywall without studs—avoid plastic screws)
Closet rod
Wardrobe Bracket
You'll find this project straightforward and manageable, even if you've never worked in a closet before. Just follow each step, and you'll soon enjoy a sturdier, more organized closet.
Measure your closet carefully before starting to ensure the rod and brackets fit perfectly.
Always mount wardrobe brackets into wood studs or use a wood support board for strong support.
Place brackets about 12 inches from the rear wall and add a center bracket for rods longer than 34 inches to prevent sagging.
Use a level to align brackets precisely for a neat, stable closet rod installation.
Test the rod's stability after installation and tighten screws or adjust brackets if needed to keep your closet safe and sturdy.
Before you start drilling or marking anything, you need to measure the width of your closet. Grab your tape measure and check the distance from one side wall to the other. This step helps you figure out the right length for your closet rod and ensures your wardrobe brackets will fit perfectly. Most closets range from 3 to 6 feet wide, but always measure the width of your closet to be sure. For adult single rods: 60 inches (152.4cm) from the floor; for kids' single rods: 48 inches (121.9cm) (easy for children to reach). Double rods: Lower rod 30–40 inches (76.2–101.6cm) (kids’ clothes/short items), upper rod 80–82 inches (203.2–208.3cm) (adult long items). For sloped-ceiling closets, adjust upper rod height to avoid touching the ceiling (leave at least 4 inches/10.2cm clearance).
Tip: Clear out your closet before you measure. Remove any old rods, shelves, or items. This gives you a clean space and makes it easier to get accurate measurements.
If your closet has multiple walls, check for at least 28 to 30 inches of clearance between them. This space lets you hang clothes without them getting cramped. Always double-check your measurements before buying your closet rod or wardrobe bracket.
Now that you know your closet's size, it's time to find the wood studs. These provide the best support for your wardrobe brackets. Use an electronic stud finder and slowly move it across the closet wall. Mark each stud with a pencil. You can also tap the wall and listen for a solid sound, or use a magnet to find drywall screws attached to wood studs. Outlets and windows often sit on wood studs, so measure from these points if needed.
Once you find the wood studs, use painter's tape to mark a straight line at the height where you want your wardrobe bracket. Mark the exact spots for each bracket on the tape. This keeps your wall clean and helps you adjust if needed. If you can't find wood studs where you want to install a bracket, you'll need extra support. Attach a wood support board across the closet wall, screwing it into the nearest wood studs. This board gives your wardrobe bracket a strong anchor point.
Note: Drywall alone won't hold much weight. Always try to mount your wardrobe bracket into wood studs or use a wood support board for extra strength.
Careful measuring and marking now will save you trouble later. Take your time, and your closet will be ready for sturdy wardrobe brackets and a secure closet rod.
Getting the right spot for each wardrobe bracket makes a huge difference in your closet's strength and function. You want to make sure your clothes hang straight and the rod stays sturdy. For most closets, place the wardrobe bracket so the center of the rod sits about 11.75 to 12 inches from the rear wall. This distance gives enough room for hangers and keeps clothes from rubbing against the back. If your closet is less than 24 inches deep, you can move the bracket closer—about 10 inches from the wall works well for shallower spaces.
If your closet is wide, you need extra support in the middle. For rods longer than 34 inches, add a center support bracket. This step helps prevent sagging and keeps everything stable. Here's a quick checklist for placing your wardrobe brackets:
Measure from the rear wall to mark 12 inches for the rod centerline.
Mark bracket spots at both ends and in the center for longer rods.
Make sure each bracket lines up with a stud or a solid wood support.
Tip: Always follow the manufacturer's instructions for your specific wardrobe bracket. Some designs need special placement or extra backing.
You want your closet to look neat and work well, so grab a level before you attach anything. Place the level across your bracket marks to check that everything lines up perfectly. Even a small tilt can cause the rod to slide or the doors to move unevenly. Take your time with this step—don't rush. If you skip careful leveling, you might end up with sagging rods or doors that don't close right.
Hold the level against your marks for each bracket.
Adjust the marks until the bubble sits in the center.
Double-check both ends and the center support before drilling.
A level rod helps support the clothes rail evenly and keeps your closet looking sharp. Proper alignment also protects your closet from long-term damage, like sagging or misaligned doors. Once you finish marking and leveling, you’re ready to move on to installation.
Ready to get hands-on? You're about to make your closet stronger and more organized. Let's walk through each step so you can install a closet rod and wardrobe bracket with confidence.
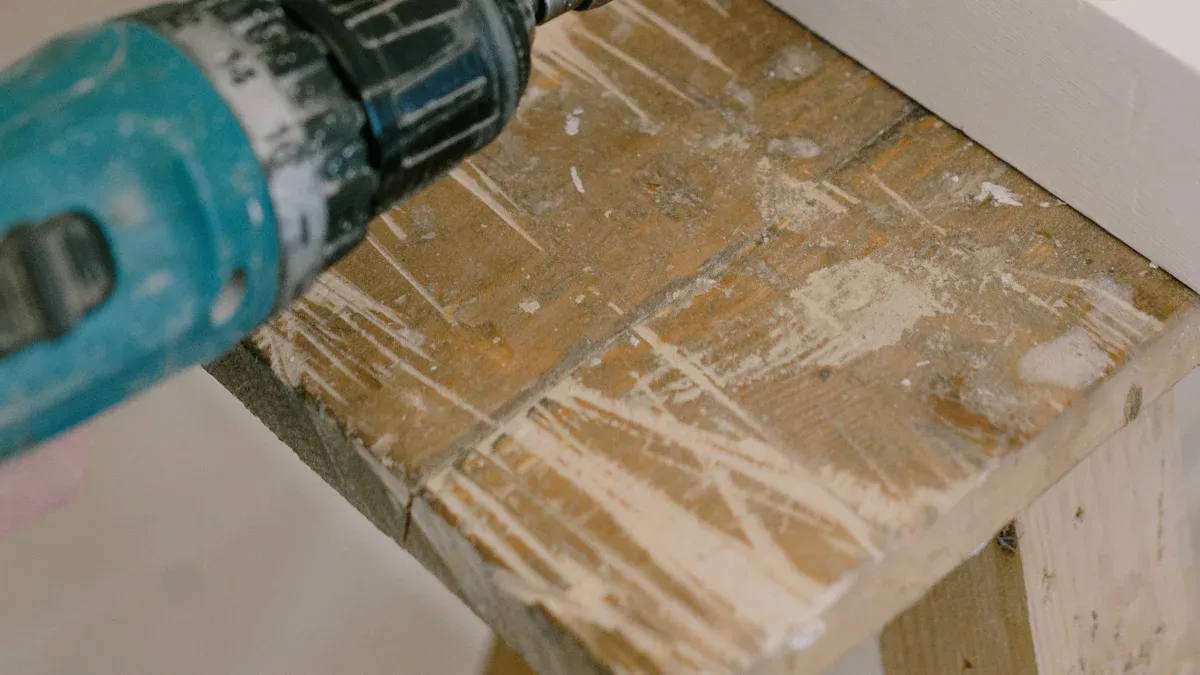
Drilling pilot holes is the first step in a solid installation. You want to make sure your screws go in smoothly and your closet walls stay intact. Here's how you do it:
Use a stud finder to double-check the location of wood studs or any wood supports you added earlier.
Mark the center of each stud where you plan to mount your wardrobe bracket, wardrobe end bracket, or wardrobe centre bracket.
Pick a drill bit that's slightly smaller than your screws. For wood studs, use a wood drill bit. If you hit metal studs, grab a cobalt or titanium bit.
Hold your drill perpendicular to the wall. Drill slowly and apply gentle pressure until you feel the bit pass through drywall and into the stud.
Drill to a depth of about 1 to 1.5 inches. This gives your screws plenty of grip.
If you're working with hollow drywall, use heavy-duty drywall anchors for extra support.
Always wear safety goggles and use painter's tape to protect the wall surface.
Tip: Pre-drilling pilot holes helps prevent wood splitting and makes it easier to screw in your wardrobe bracket securely.
Now you're ready to attach the brackets. This step locks everything in place and sets the foundation for your clothes rod.
Use 2-1/2 inch screws to secure your wardrobe bracket, wardrobe end bracket, or wardrobe centre bracket directly into wood studs or wood supports. This length gives you maximum strength.
If you can't reach a stud, use heavy-duty drywall anchors. Avoid plastic anchors—they don't hold enough weight for a closet rod.
Line up each bracket with your pilot holes. Hold the bracket steady and drive the screws in until they're snug, but don't overtighten.
Make sure the wardrobe socket is facing straight up if your bracket design uses one. This makes it easier to insert the rod later.
Double-check that all brackets are level and aligned before moving on.
Note: Skimping on screws or skipping brackets can lead to sagging or falling rods. Always use all the hardware provided by the manufacturer.
You're almost done! Now it's time to install a closet rod and make sure it's secure.
Hold the wardrobe socket in position on each bracket. Use a pencil to mark the screw holes.
Drill pilot holes at each mark to prevent splitting.
Attach the sockets to the wall by lining them up with the pilot holes and driving in the screws.
Measure your closet rod. If it's too long, cut it to size. If it's adjustable, set the length to fit your closet.
Insert the rod by placing one end into the solid circle socket, then drop the other end into the open side socket.
Test the rod's stability by gently pulling down. If it feels loose, tighten the screws or check the bracket alignment.
Once you're sure everything is secure, you can hang your clothes on the clothes rod.
Most installed wardrobe brackets in residential closets can hold up to 33 lbs (15 kg). Always check your hardware's weight rating before loading up your closet.
Callout: If you want extra support for longer rods, add a wardrobe centre bracket in the middle. This keeps your closet rod from sagging and helps distribute weight evenly.
You've just learned how to install a closet rod and wardrobe bracket step by step. Take your time with each part, and you'll end up with a sturdy, reliable closet that's ready for anything.
Sometimes you discover that your closet walls have no studs where you want to mount your wardrobe bracket. Don't worry—you still have options for a strong installation. Here’s what you can do:
Use wall anchors like toggle bolts, molly bolts, or threaded anchors. These provide solid support for your wardrobe bracket in drywall.
Mark your installation points carefully. Accurate marks help keep your closet rod level and stable.
Drill holes and insert anchors so they sit flush with the wall. This prevents damage and gives your bracket a firm grip.
Secure the bracket tightly to the anchors. After you finish, test the rod's stability.
Distribute the weight of your clothes evenly across the rod. This reduces stress on any single anchor.
Place painter's tape over drilling spots to minimize drywall cracking.
For extra support, consider aluminum panel clips.
Always check for wires or pipes before drilling and wear protective gear.
If you run into loose anchors, try using larger ones or toggle bolts. Fill oversized holes with wall repair compound before reinstalling. For metal studs, use metal thread screws or heavy-duty toggle bolts. Avoid plastic anchors—they don't hold enough weight for a closet rod.
Uneven or sloped closet walls can make bracket installation tricky. You want your wardrobe bracket to sit level so your closet rod stays straight. Try these steps:
Build a wooden framework as a base for your closet elements.
Attach cross beams to support the sides.
Use shims to fill any gaps and level the framework.
Screw drywall panels onto the wood for a smooth surface.
Measure gaps at the ceiling and cut MDF sheets to fit, gluing them in place for a built-in look.
Finish the drywall with tape, filler, and sanding.
Prime and paint the walls for a clean finish.
Seal edges with acrylic for a tight fit.
These steps help you create a sturdy, even surface for your wardrobe bracket and closet rod.
Before you load up your closet, always test the stability of your wardrobe bracket and rod. Gently push down or hang a few items on the rod. The rod should not sag or wobble. If you notice movement, check that all screws are tight and the brackets are secure. For longer rods, make sure you have a center support bracket. If the rod still feels loose, tighten the anchors or reposition the brackets. A stable closet setup keeps your clothes safe and your installation trouble-free.
You've just learned how to install wardrobe brackets and create a stronger, more organized closet. Before you fill your closet, double-check stability to keep everything safe and secure.
Make sure all brackets anchor into studs or solid supports.
Test the rod for movement and tighten any loose screws.
Regularly inspect your closet setup to catch wear early.
Take your time with each step. Soon, you'll enjoy a closet that looks great and keeps your clothes safe for years to come!
You want a wardrobe bracket that matches your closet’s depth and rod size. For longer rods, add a wardrobe centre bracket for extra support. Always check the weight rating before you buy.
Yes, you can! Place a wardrobe end bracket on each side of your closet. Use a wardrobe socket to hold the rod securely. This combo keeps your closet rod stable and prevents it from slipping.
First, check the screws. Tighten them if needed. If the wardrobe bracket still moves, switch to stronger anchors or add a wardrobe centre bracket. You want everything to feel solid before hanging clothes.
You usually don’t need a wardrobe centre bracket for rods under 34 inches. For longer rods, a centre bracket stops sagging. Always use a wardrobe bracket and wardrobe socket at each end for best results.


