
Views: 0 Author: Site Editor Publish Time: 2026-06-18 Origin: Site


A failed wardrobe bracket does not just damage drywall. It creates costly repairs and severely compromises household safety. Waking up to a collapsed closet rod is a stressful scenario you definitely want to avoid. Installing closet hardware correctly requires evaluating wall integrity first. You must calculate dynamic loads, considering the weight of clothes you push and pull daily. You also need to select the appropriate hardware architecture before you ever pick up a drill. Many people rush this process, leading to inevitable hardware failure under heavy winter coats. This guide details the exact structural requirements necessary for a solid setup. We outline key hardware evaluation criteria to help you choose wisely. Finally, we provide professional implementation steps to ensure a secure, long-lasting installation. You will learn how to properly anchor your system and prevent sagging over time.
Standard builder-grade brackets often fail under the weight of modern winter wardrobes. Builders typically use the cheapest available stamped metal or plastic components to cut costs. These lightweight parts work fine for a few empty hangers. However, they quickly bend or snap when you load them up. Evaluating your storage needs upfront prevents catastrophic hardware failure. You must look at the volume of clothing you plan to hang. Heavy wool coats demand much stronger hardware than summer shirts.
You generally choose between two main solution categories. Fixed-mount brackets offer high stability and a lower initial cost. They bolt directly to the wall and hold a single rod. They provide zero post-installation flexibility. You cannot easily move them once secured. We recommend fixed mounts for standardized, unchanging closet layouts where you know your needs will remain constant.
Conversely, you might install an Adjustable Wardrobe Bracket system. This approach utilizes a horizontal top track and vertical hanging standards. It requires a higher initial investment. However, it allows for localized weight distribution across multiple wall studs. It also offers highly scalable reconfiguration as your storage needs change over the years. You can easily move rods up or down without drilling new holes.
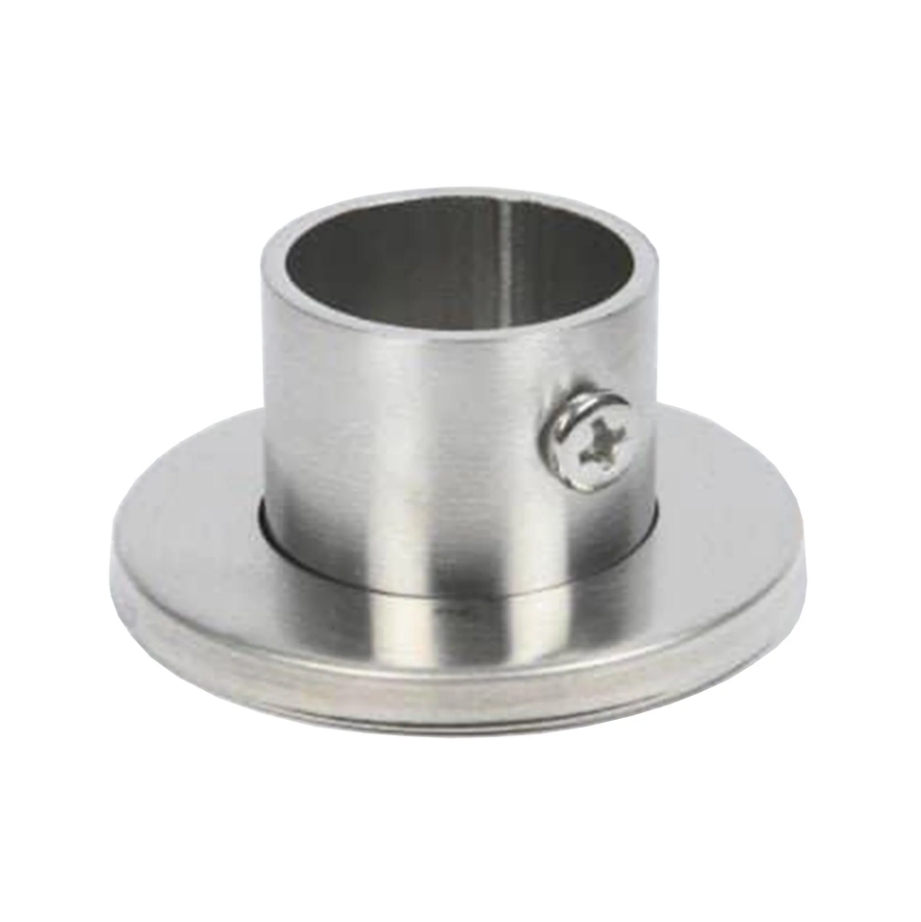
When selecting your hardware, assess brackets based on several strict evaluation criteria. Look at the gauge of the steel first. Standard brackets use thin 18-gauge steel, but heavy-duty options use much thicker 14-gauge steel. Examine the integrated rod-hook design. A closed-loop design captures the rod entirely so it cannot pop out during use. Open-hook designs are cheaper but allow the rod to jump upward if bumped. Finally, always verify the stated shear-weight limits provided by the manufacturer.
| System Type | Flexibility | Installation Complexity | Best Use Case | Load Distribution |
|---|---|---|---|---|
| Fixed-Mount Bracket | Zero (Permanent) | Low to Medium | Guest rooms, standard reach-in closets | Point-load directly on isolated fasteners |
| Adjustable Track System | High (Easily reconfigured) | Medium to High | Master bedrooms, growing children's rooms | Weight distributed evenly along the top track |
Anchoring directly into half-inch drywall without assessing the substrate remains the primary cause of bracket failure. Drywall consists of compressed gypsum dust wrapped in paper. It has very little structural integrity on its own. It crumbles under sustained, concentrated pressure. You must identify exactly what lives behind your wall paint before drilling.
Wood studs provide the optimal anchoring point. Securing your Wardrobe Bracket into wooden framing requires a reliable magnetic or electronic stud finder. Solid wood provides maximum shear strength, resisting the downward pull of heavy garments. Verification of center-stud alignment is absolutely mandatory for heavy-duty applications. Hitting the edge of a stud weakens the wood and causes screws to splinter out sideways.
Drywall and plaster represent high-risk substrates. Sometimes stud mounting is impossible due to awkward closet layouts. If you must mount directly to hollow drywall, evaluate the use of snap-toggles or heavy-duty hollow wall anchors. These devices open up behind the drywall to disperse the pulling force over a wider surface area. Never rely on cheap plastic friction anchors for load-bearing wardrobe components. They will slowly pull out, creating massive holes in your wall.
Concrete or masonry walls require highly specialized approaches. You will need masonry drill bits and expanding metal sleeves to penetrate brick or cement block. This substrate offers immense, industrial-grade hold. However, it demands precise pre-drilling and a hammer drill to execute properly.
A successful installation begins long before you touch the wall. Gathering the correct components prevents mid-project frustrations. You need a comprehensive procurement checklist to ensure you miss nothing. Buying incorrect fasteners often ruins a weekend project quickly.
First, secure your primary hardware. Choose a bracket matching your calculated load. Ensure total rod compatibility before leaving the store. Standard wardrobe tubes range from one inch to one and five-sixteenths inches in diameter. A bracket hook designed for a small rod will not accept a thicker, heavy-duty tube.
Next, gather your fasteners. Throw away the tiny screws included in the retail packaging. They are usually too short to penetrate drywall and reach deep into wood studs. Buy high-quality number-ten by two-inch wood screws for stud mounting. Purchase quarter-inch toggle bolts for any unavoidable drywall sections.
You also need a specific set of tools to ensure accuracy and structural safety. Having the right instruments makes the job significantly easier.
Please note an important compliance and safety standard. Verify the purchased bracket load rating carefully. Your hardware should exceed your calculated maximum load by at least twenty-five percent. This buffer accounts for dynamic stress. When you aggressively slide fifty hangers across a metal rod, the friction creates immense lateral and downward force. Your hardware must absorb this shock without failing.
Following a strict sequence of operations guarantees a professional result. Shortcuts usually lead to crooked rods or pulled drywall. Take your time during the measuring phase to save headaches later.
Step 1: Establishing the Datum Line
Begin by measuring and marking the desired height. Industry standard places the rod at 66 to 68 inches for a single hang application. This height easily accommodates long dresses and winter coats. For a double hang layout, place the top rod at 80 inches and the bottom rod at 40 inches. Use a laser level to strike a continuous horizontal line across the entire installation zone. This datum line serves as your ultimate guide.
Step 2: Locating and Verifying Anchoring Points
Run your stud finder along the laser line. Mark the exact center of each wall stud using a pencil. A maximum span of 32 to 36 inches between brackets is highly recommended. Exceeding this distance allows the metal wardrobe tube to bend under heavy loads. If your studs sit 24 inches apart, place a bracket on every single stud to maximize strength.
Step 3: Pre-Drilling to Mitigate Material Stress
Never drive a thick screw directly into a wood stud without preparation. You must drill pilot holes first. Use a drill bit slightly smaller than the screw shank itself. Pre-drilling prevents the wooden framing from splitting behind the drywall. It also ensures maximum thread engagement, allowing the screw to bite deeply into solid fibers.
Step 4: Bracket Alignment and Torquing
Position your bracket over the pilot hole. Install the primary top screw loosely. Do not tighten it fully yet. Place a small torpedo level against the vertical edge of the bracket. Verify perfect plumb alignment. Once perfectly straight, drive the remaining fasteners into place. Avoid over-torquing your drill. Spinning the screw too fast strips the wood substrate, instantly ruining its holding power.
Step 5: Rod Seating and Deflection Testing
Insert the wardrobe tube into the bracket hooks. Before loading it up with heavy garments, perform a physical test. Grab the rod near the center span and apply localized downward pressure. Watch the brackets closely. Look for any wall movement, screw shifting, or bracket flex. If the hardware shifts under your body weight, you need to tighten the fasteners or upgrade your anchors.
Your job does not end immediately after hanging the rod. You must address minor environmental factors to ensure extreme longevity. Residential walls are rarely perfectly flat. Mudding compound often creates unseen waves in the drywall surface.
If your walls appear bowed, utilize wooden or plastic shims. Slide these thin wedges behind the bracket backplate before final tightening. Tightening a flat metal bracket against a curved wall causes structural warping. The metal bends inward, stressing the welds and compromising the overall load capacity. Shims fill the gap and keep the hardware perfectly rigid.
You must also prevent lateral shift. Many high-quality brackets include small set-screws located near the hook. Secure the wardrobe rod to the bracket by tightening these integrated set-screws. This stops the metal tube from sliding left or right during aggressive hanger movement. A sliding rod can easily pop out of end-sockets, bringing your entire wardrobe crashing down.
Finally, establish a habit of monitoring hardware wear. Every few months, inspect the wall around your anchors. Look closely for micro-cracking in the paint around the bracket base. Hairline cracks indicate the hardware is slowly pulling away from the drywall. This serves as an early warning indicator of impending shear failure. Catching this early allows you to reinforce the mount before a total collapse occurs.
Proper wardrobe bracket installation effectively bridges the gap between hardware capability and structural safety. Your ultimate success relies entirely on accurate substrate evaluation and strict adherence to load parameters. Skipping steps or guessing stud locations inevitably leads to severe drywall damage.
Before purchasing your hardware, take time to measure your exact closet run carefully. Map out your wall studs using a reliable tool. Determine if a modular, track-based system or a permanent, fixed-mount solution best aligns with your long-term storage strategy. By respecting dynamic weight loads and using robust fasteners, you guarantee a durable, professional-grade closet upgrade.
A: When properly anchored directly into solid wood studs, high-quality brackets can hold 50 to 100 lbs per bracket. Drywall-only installations using toggle bolts reduce this overall capacity by up to 50% and carry a significantly higher risk of failure.
A: Industry standards mandate a maximum spacing of 32 to 36 inches between supports. Exceeding this distance inevitably causes the hanging rod to bow, warp, or permanently bend under the weight of heavy garments.
A: Yes, but you absolutely must not reuse the compromised drywall holes. The top track of an adjustable system must be anchored directly into fresh, secure wood studs, completely bypassing the old drywall damage to ensure structural safety.
A: For single-rod applications accommodating dresses and long winter coats, 66 to 68 inches from the floor serves as the standard. For double-rod setups, place the top bracket at 80 inches and the bottom bracket exactly at 40 inches.


